using ubuntu 17.10+ add a *.network file sudo nano /lib/systemd/network/100-somecustom.network :
[Match]
Name=wlo1

[Network] # add multiple DNS
DNS=8.8.8.8
DNS=208.67.222.222
Then restart:
sudo service systemd-networkd restart
Also look into:
netplan apply
Then check:
systemd-resolve --status wlo1
From info page info systemd.network :
In addition to /etc/systemd/network, drop-in “.d” directories can beplaced in /lib/systemd/network or /run/systemd/network directories. Drop-in files in /etc take precedence over those in /run which in turn take precedence over those in /lib. Drop-in files under any of these directories take precedence over the main netdev file wherever located. (Of course, since /run is temporary and /usr/lib is for vendors, it is unlikely drop-ins should be used in either of those places.)
In the quick testing I just did, that will succeed if there is outbound NAT for 192.168.1.0/24 and fail (timeout) if not so it appears to be doing what’s intended.
I couldn’t quickly find a way to tell dig to report the bind address used automatically. You might be able to catch it looking at the states. Certainly if you enable a floating match rule for TCP/UDP 53 on WAN out with logging you should get the address being used in the firewall logs.
This is an old post, but I just resolved this exact issue, which in my case turned out to be having DNSSEC enabled. Try disabling DNSSEC to see if your clients can then resolve names.
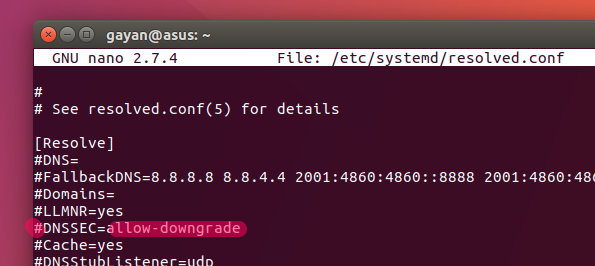
So obviously it is a DNSSEC validation error. Now DNSSEC is a DNS related security check that verifies the integrity of the DNS data. ‘systemd-resolved’ does let you turn the DNSSEC checking OFF. So that’s what I did next (it’s easy. You just have to open /etc/systemd/resolved.conf and comment out “DNSSEC” and replace “allow-downgrade” with “off“) and it worked liked a charm.
However, since DNSSEC is there to protect you from outside infiltration, it’s not recommended to turn it OFF. So what is the solution then? Well, the easiest solution I saw was to totally disable the troublesome ‘systemd-resolved’ service and replace it with a similar utility, one that actually works.
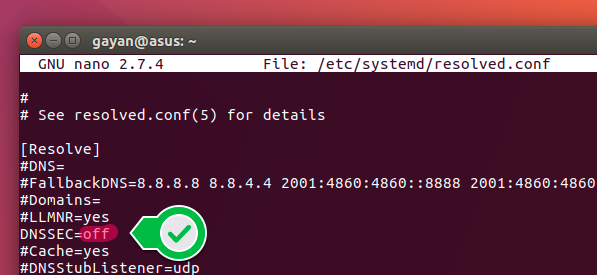
Then as shown in the below screenshot, comment out #DNSSEC=allow-downgrade and replace allow-downgrade with off .
Once done press Ctrl + x keys to save the changes, and when asked to confirm, press y and then hit Enter. Then simply restart ‘systemd-resolved’ service so the changes are applied. For that, enter the below command:
sudo systemctl restart systemd-resolved
That’s it. But remember, now you’re running DNS queries without DNSSEC which could create security risks. If you don’t feel comfortable with this, then roll back the changes you made to the configuration file and simply follow the below steps to replace ‘systemd-resolved’ with ‘unbound’.
Flush All Rules, Delete All Chains, and Accept All
Note: This will effectively disable your firewall. You should only follow this section if you want to start over the configuration of your firewall.