Integrating AWS S3 & Cloudfront With WordPress
Integrating a Content Delivery Network (CDN) to your WordPress site will noticeably improve your WordPress site visitors’ browsing experience. Learn how to setup a low-cost, high performance AWS Cloudfront CDN with this step-by-step tutorial that covers installation and configuration of both the AWS infrastructure services as well as the necessary WordPress plugins.

Summary
In this article we’ll implement the CDN and image optimization strategy that I use for this blog. When I’m working on this blog, the images that I upload to WordPress are automatically web-optimized and then replicated to Amazon’s Cloudfront CDN. Additionally, all of the image URL’s are automatically modified for me so that when you access the page, the HTML comes from this WordPress site but the images are delivered by Cloudfront CDN.
First we’ll setup a new Cloudfront CDN in our AWS account that is integrated to a free AWS S3 storage bucket. Afterwards we’ll install a WordPress plugin authored by Delicious Brains that integrates the CDN to our WordPress site. We’ll also install a second plugin from imagify.io that will automatically re-size and web-optimize our images based on how they’re presented on the page. These two plugins combined ensure that we’ve done everything reasonably possible to minimize the time that it takes site visitors to download digital assets from our site.
Configuration Procedure
AWS Setup
To setup a private CDN for our WordPress site we’ll combine three AWS services: S3, IAM and Cloudfront. S3 (Simple Storage System) is AWS’ free cloud storage solution. First, we’ll create an S3 bucket (AWS’s weird name for a cloud storage folder) which we’ll use to synchronize media content from our WordPress site using a plugin. To facilitate this synchronization we’ll need to setup an IAM (Identity Access Management) programatic user with the necessary privileges to access and write to our bucket. Finally we’ll create our Cloudfront CDN using our S3 bucket as the source data.
Amazon CloudFront is a global content delivery network (CDN) service that securely delivers data, videos, applications, and APIs to your viewers with low latency and high transfer speeds. Though it is not entirely free, typical WordPress sites spend less than $2 USD per month on AWS usage fees. You can read more about AWS Cloudfront pricing via this link. It works seamlessly with other key AWS services including AWS Shield for DDoS mitigation, Amazon S3, and Elastic Load Balancing. Cloudfront is a one-size-fits-all CDN solution that provides a remarkably simple configuration and control console relative to the complexity and sophistication of the CDN itself.
1. Setup S3 Bucket
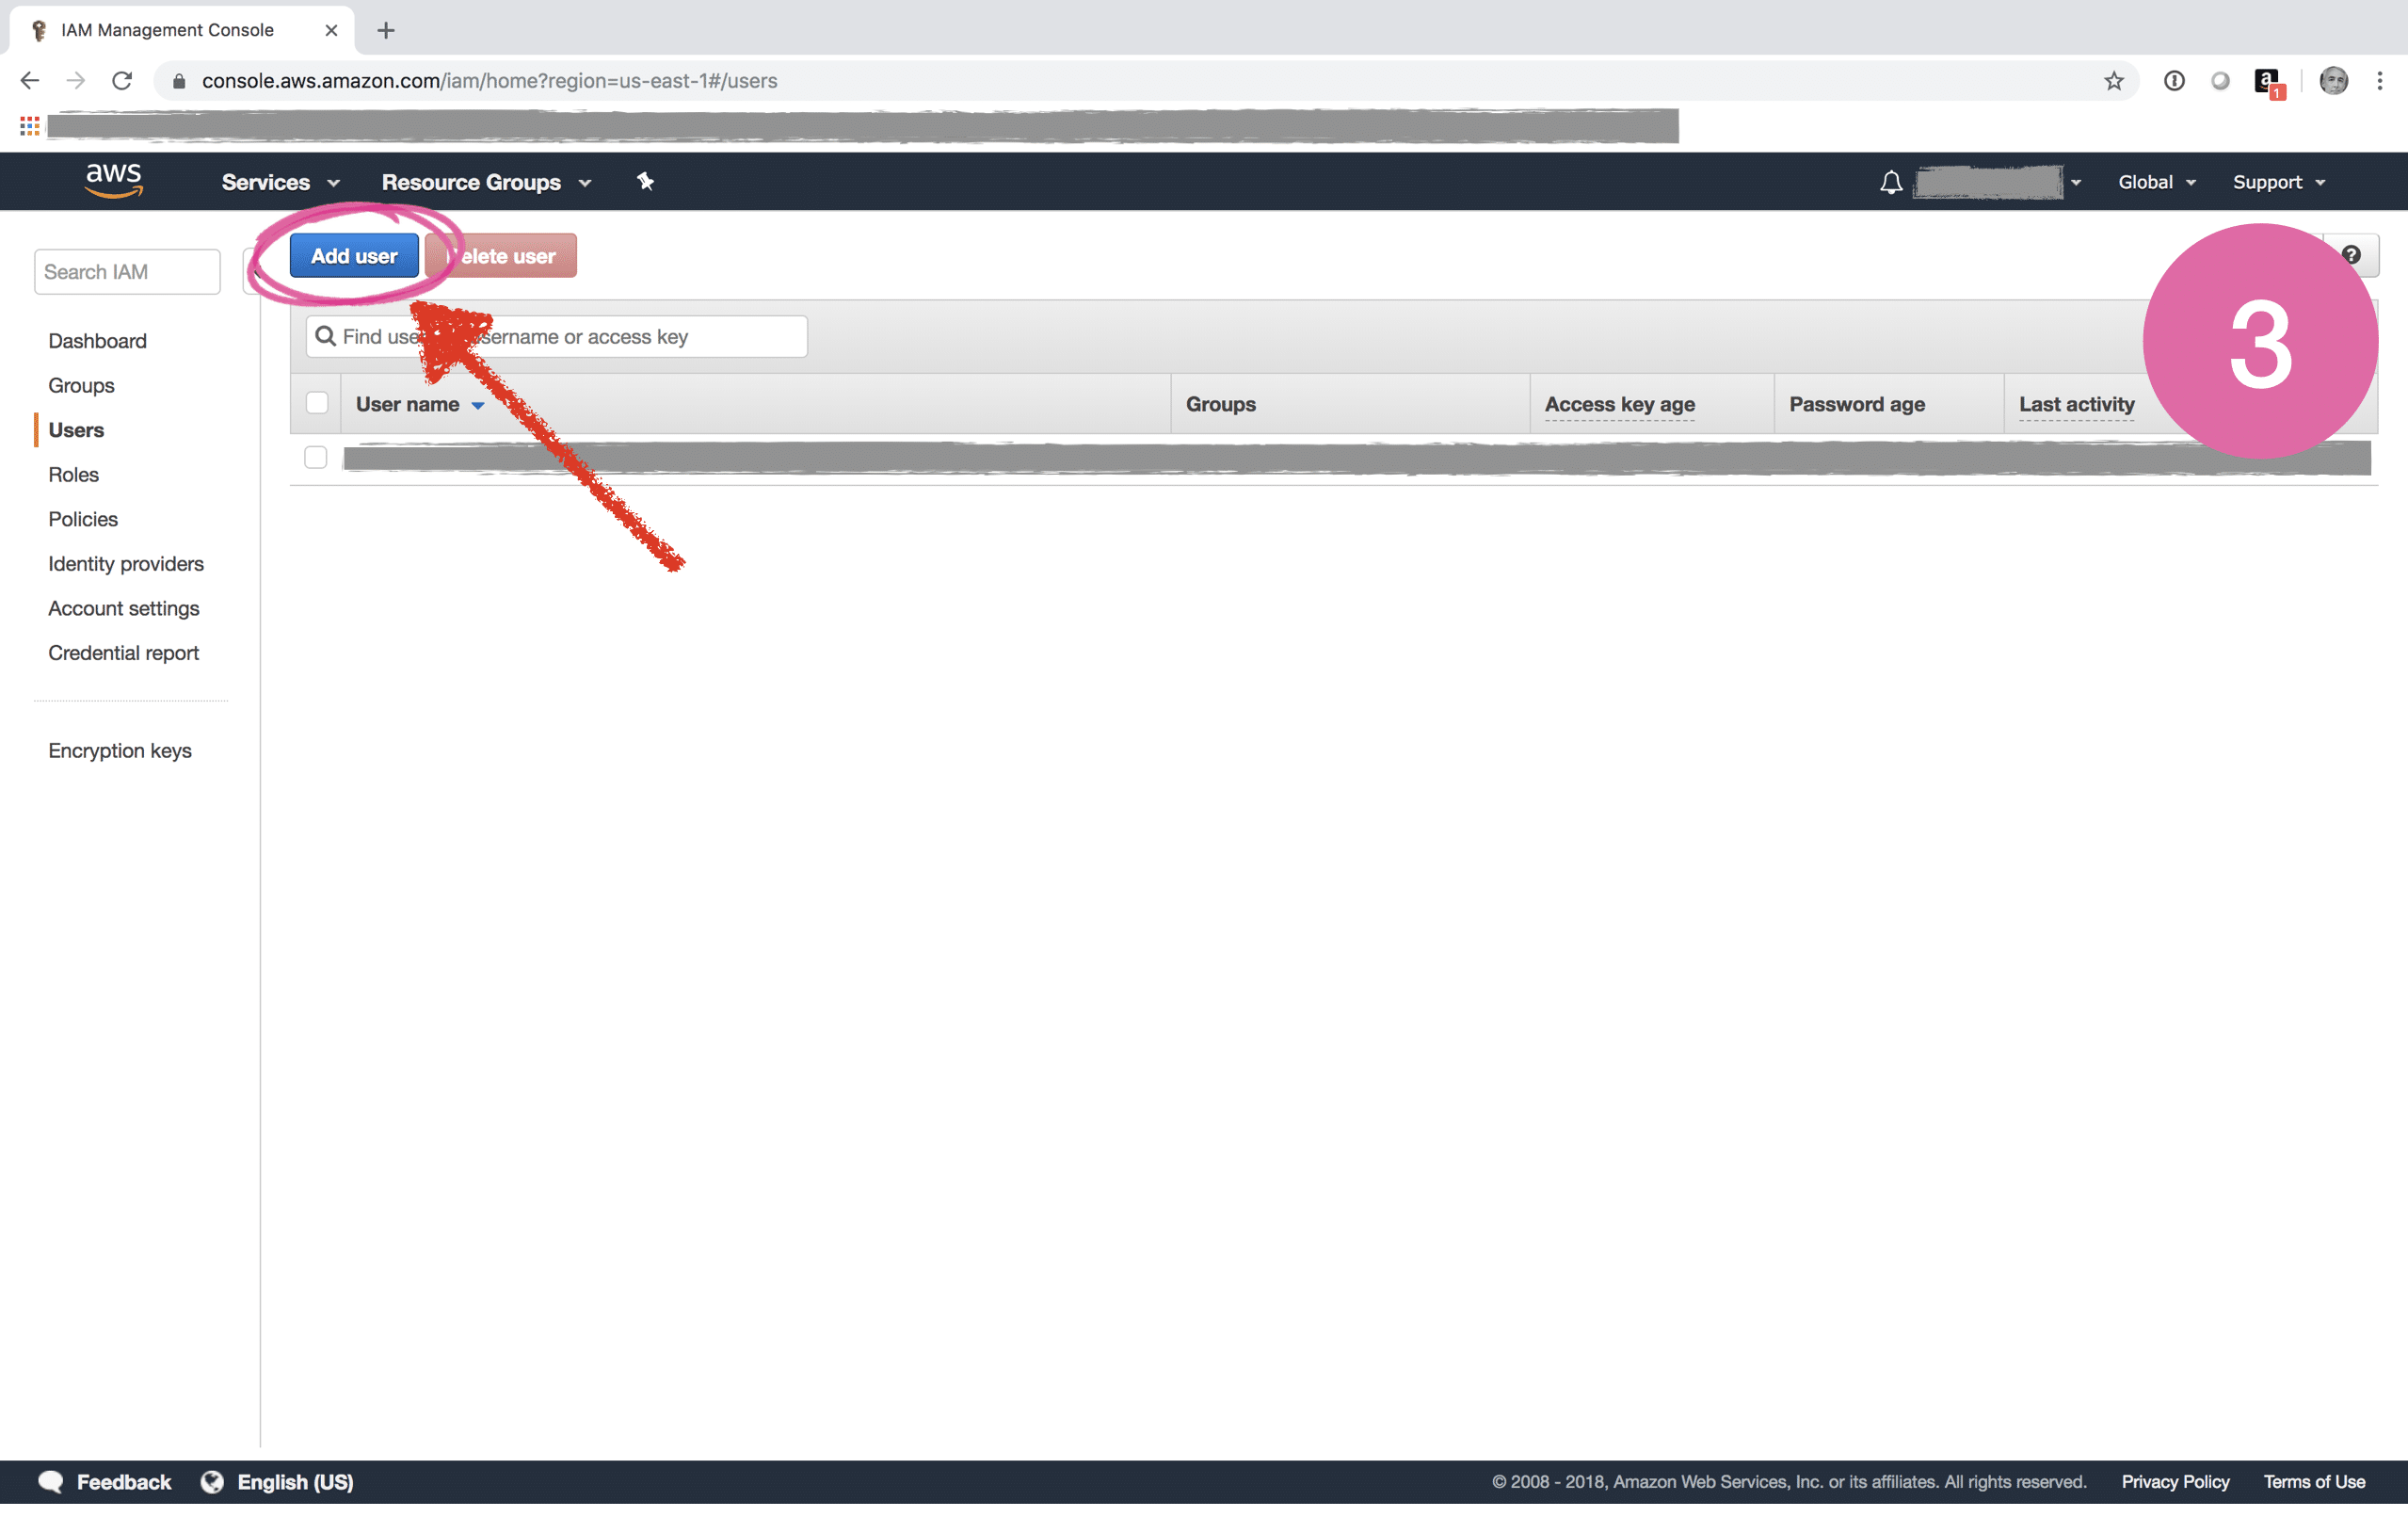
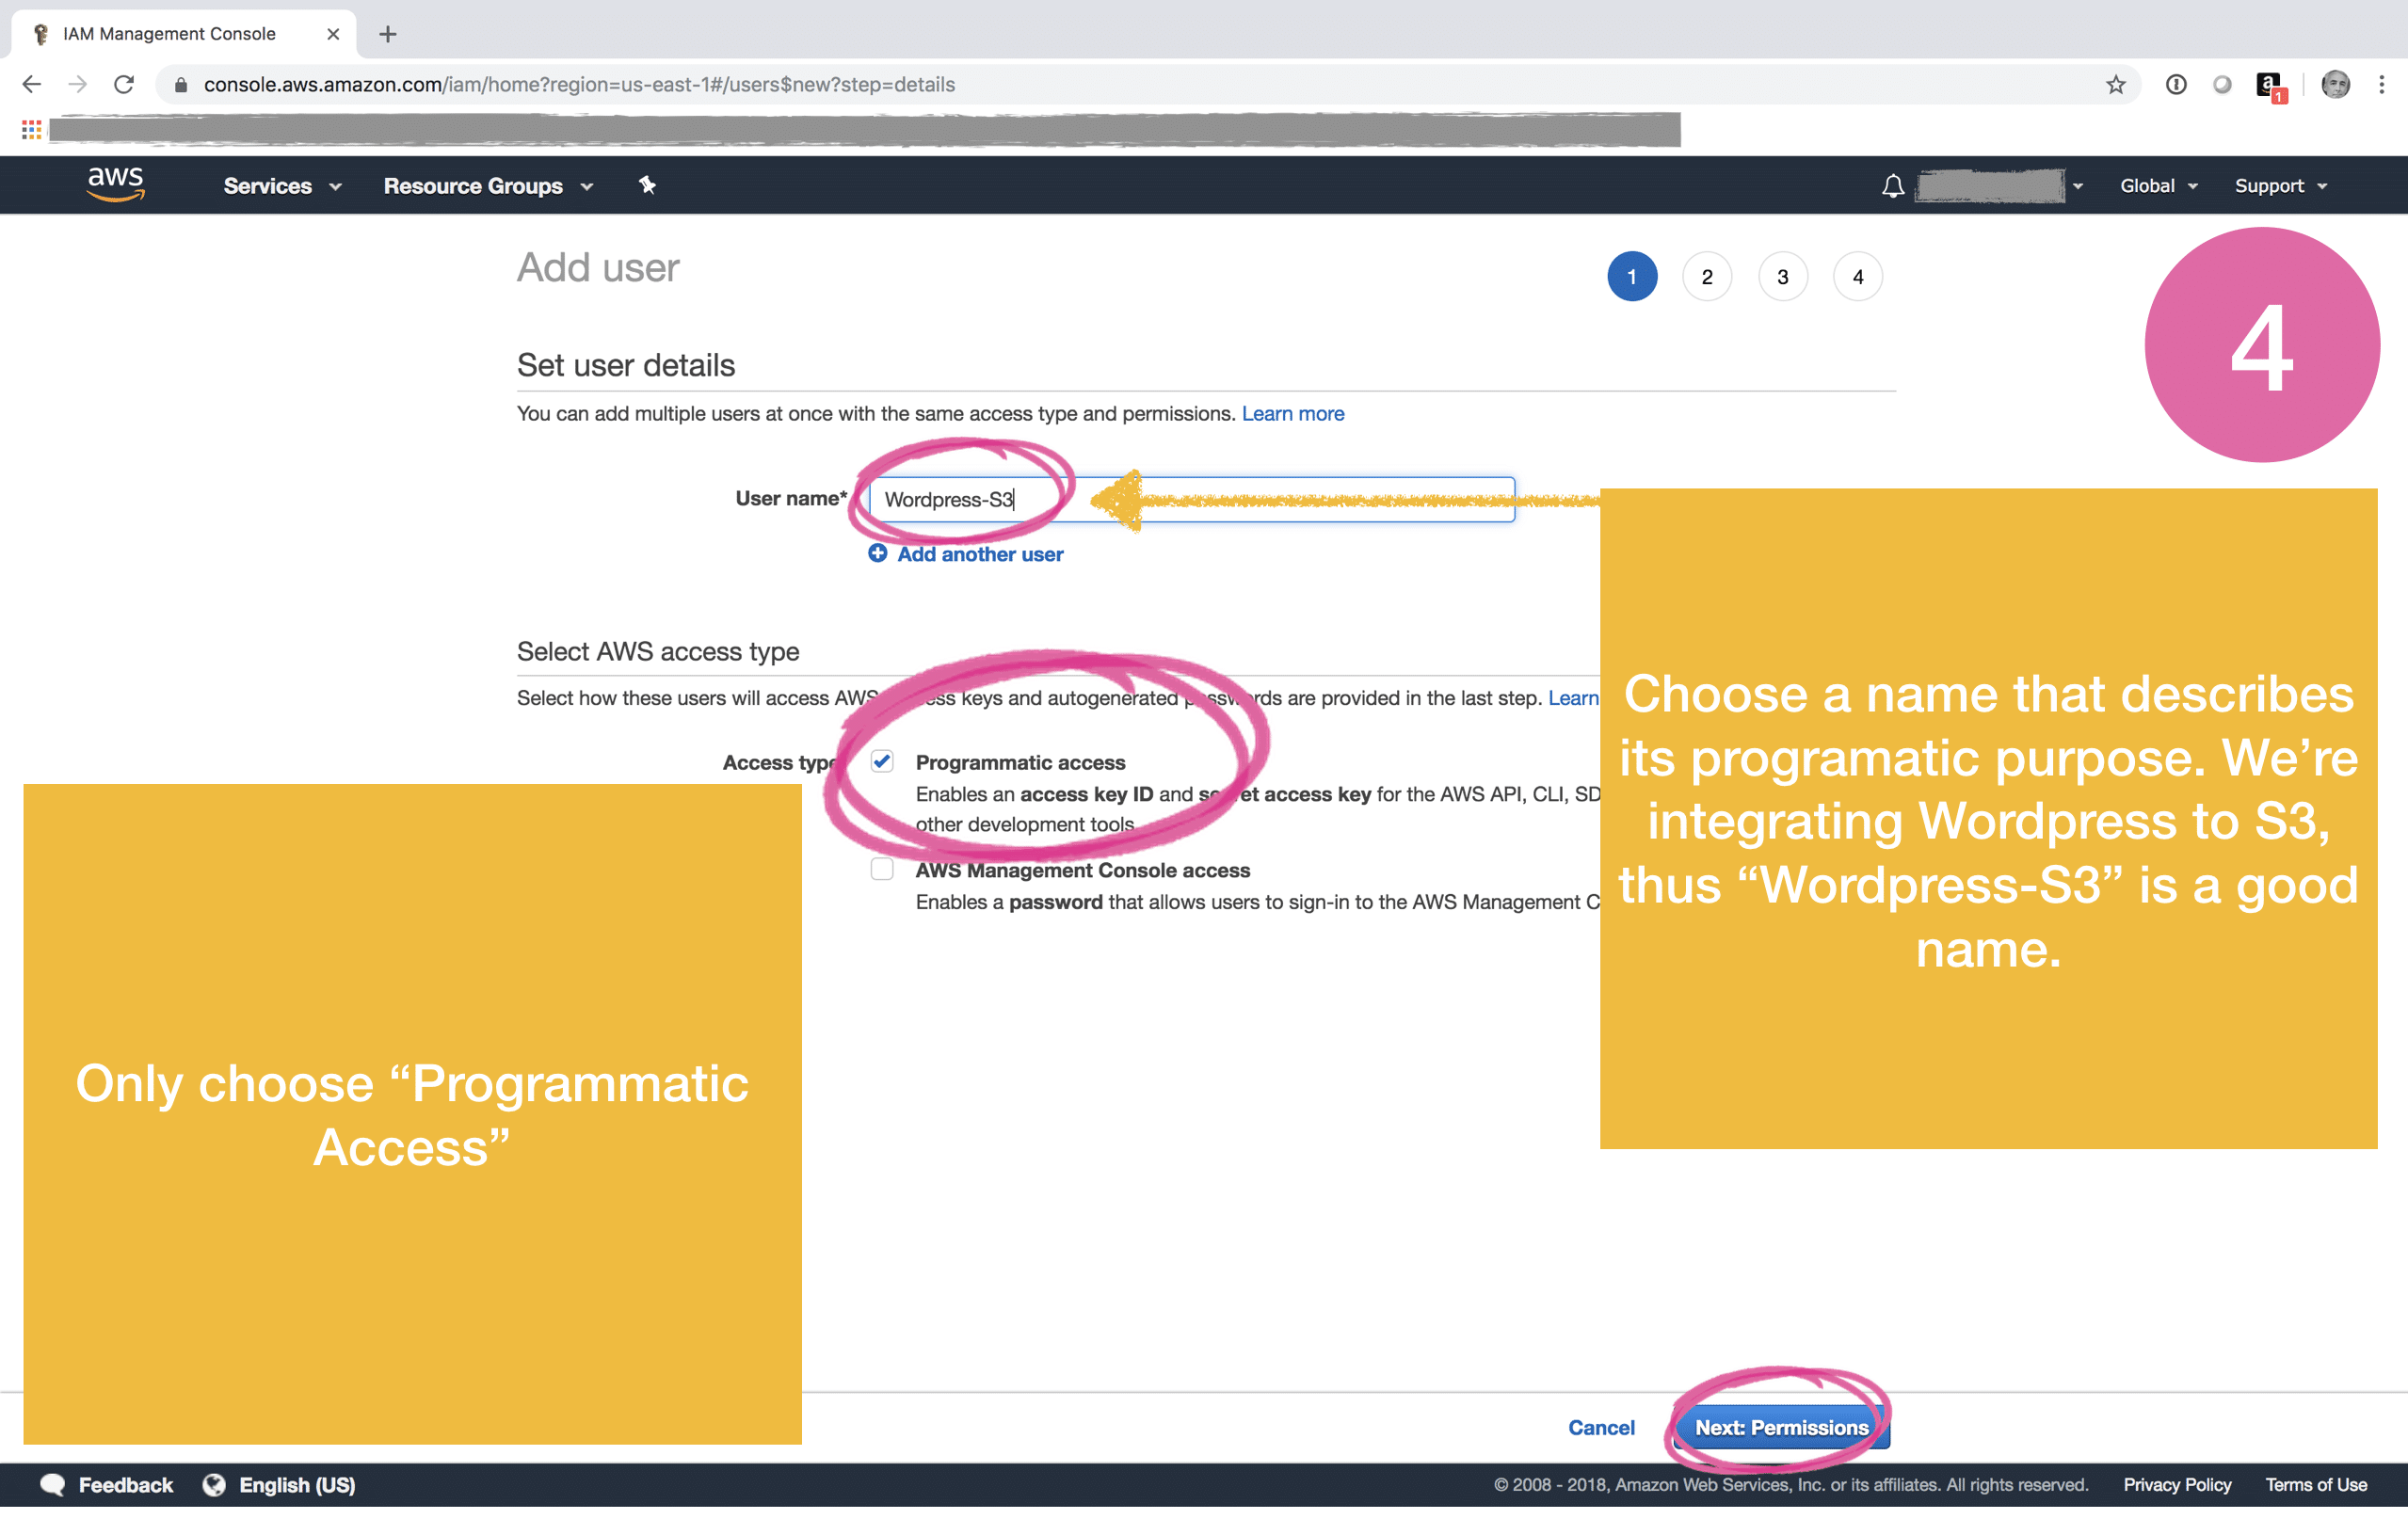
2. Setup IAM User
AWS Identity and Access Management (IAM) provides a single, integrated way to manage access to all AWS’ services and resources securely. Using IAM, you can create and manage AWS users and groups, and use pre-defined sets of permissions to allow and deny their access to AWS resources. IAM is a free service. Feel free to read more about IAM Best Practices.
We’ll use IAM to provide our WordPress site with a way to connect and synchronize files with our new S3 bucket. Our WordPress site will need to be able to create and remove folders and files, and it will also need to be able to set file-level permissions within the S3 bucket. IAM provides the option of authenticating with either a username & password, or alternatively with public/private tokens. We’ll use the latter, which might sound cryptic but is actually pretty simple to setup.
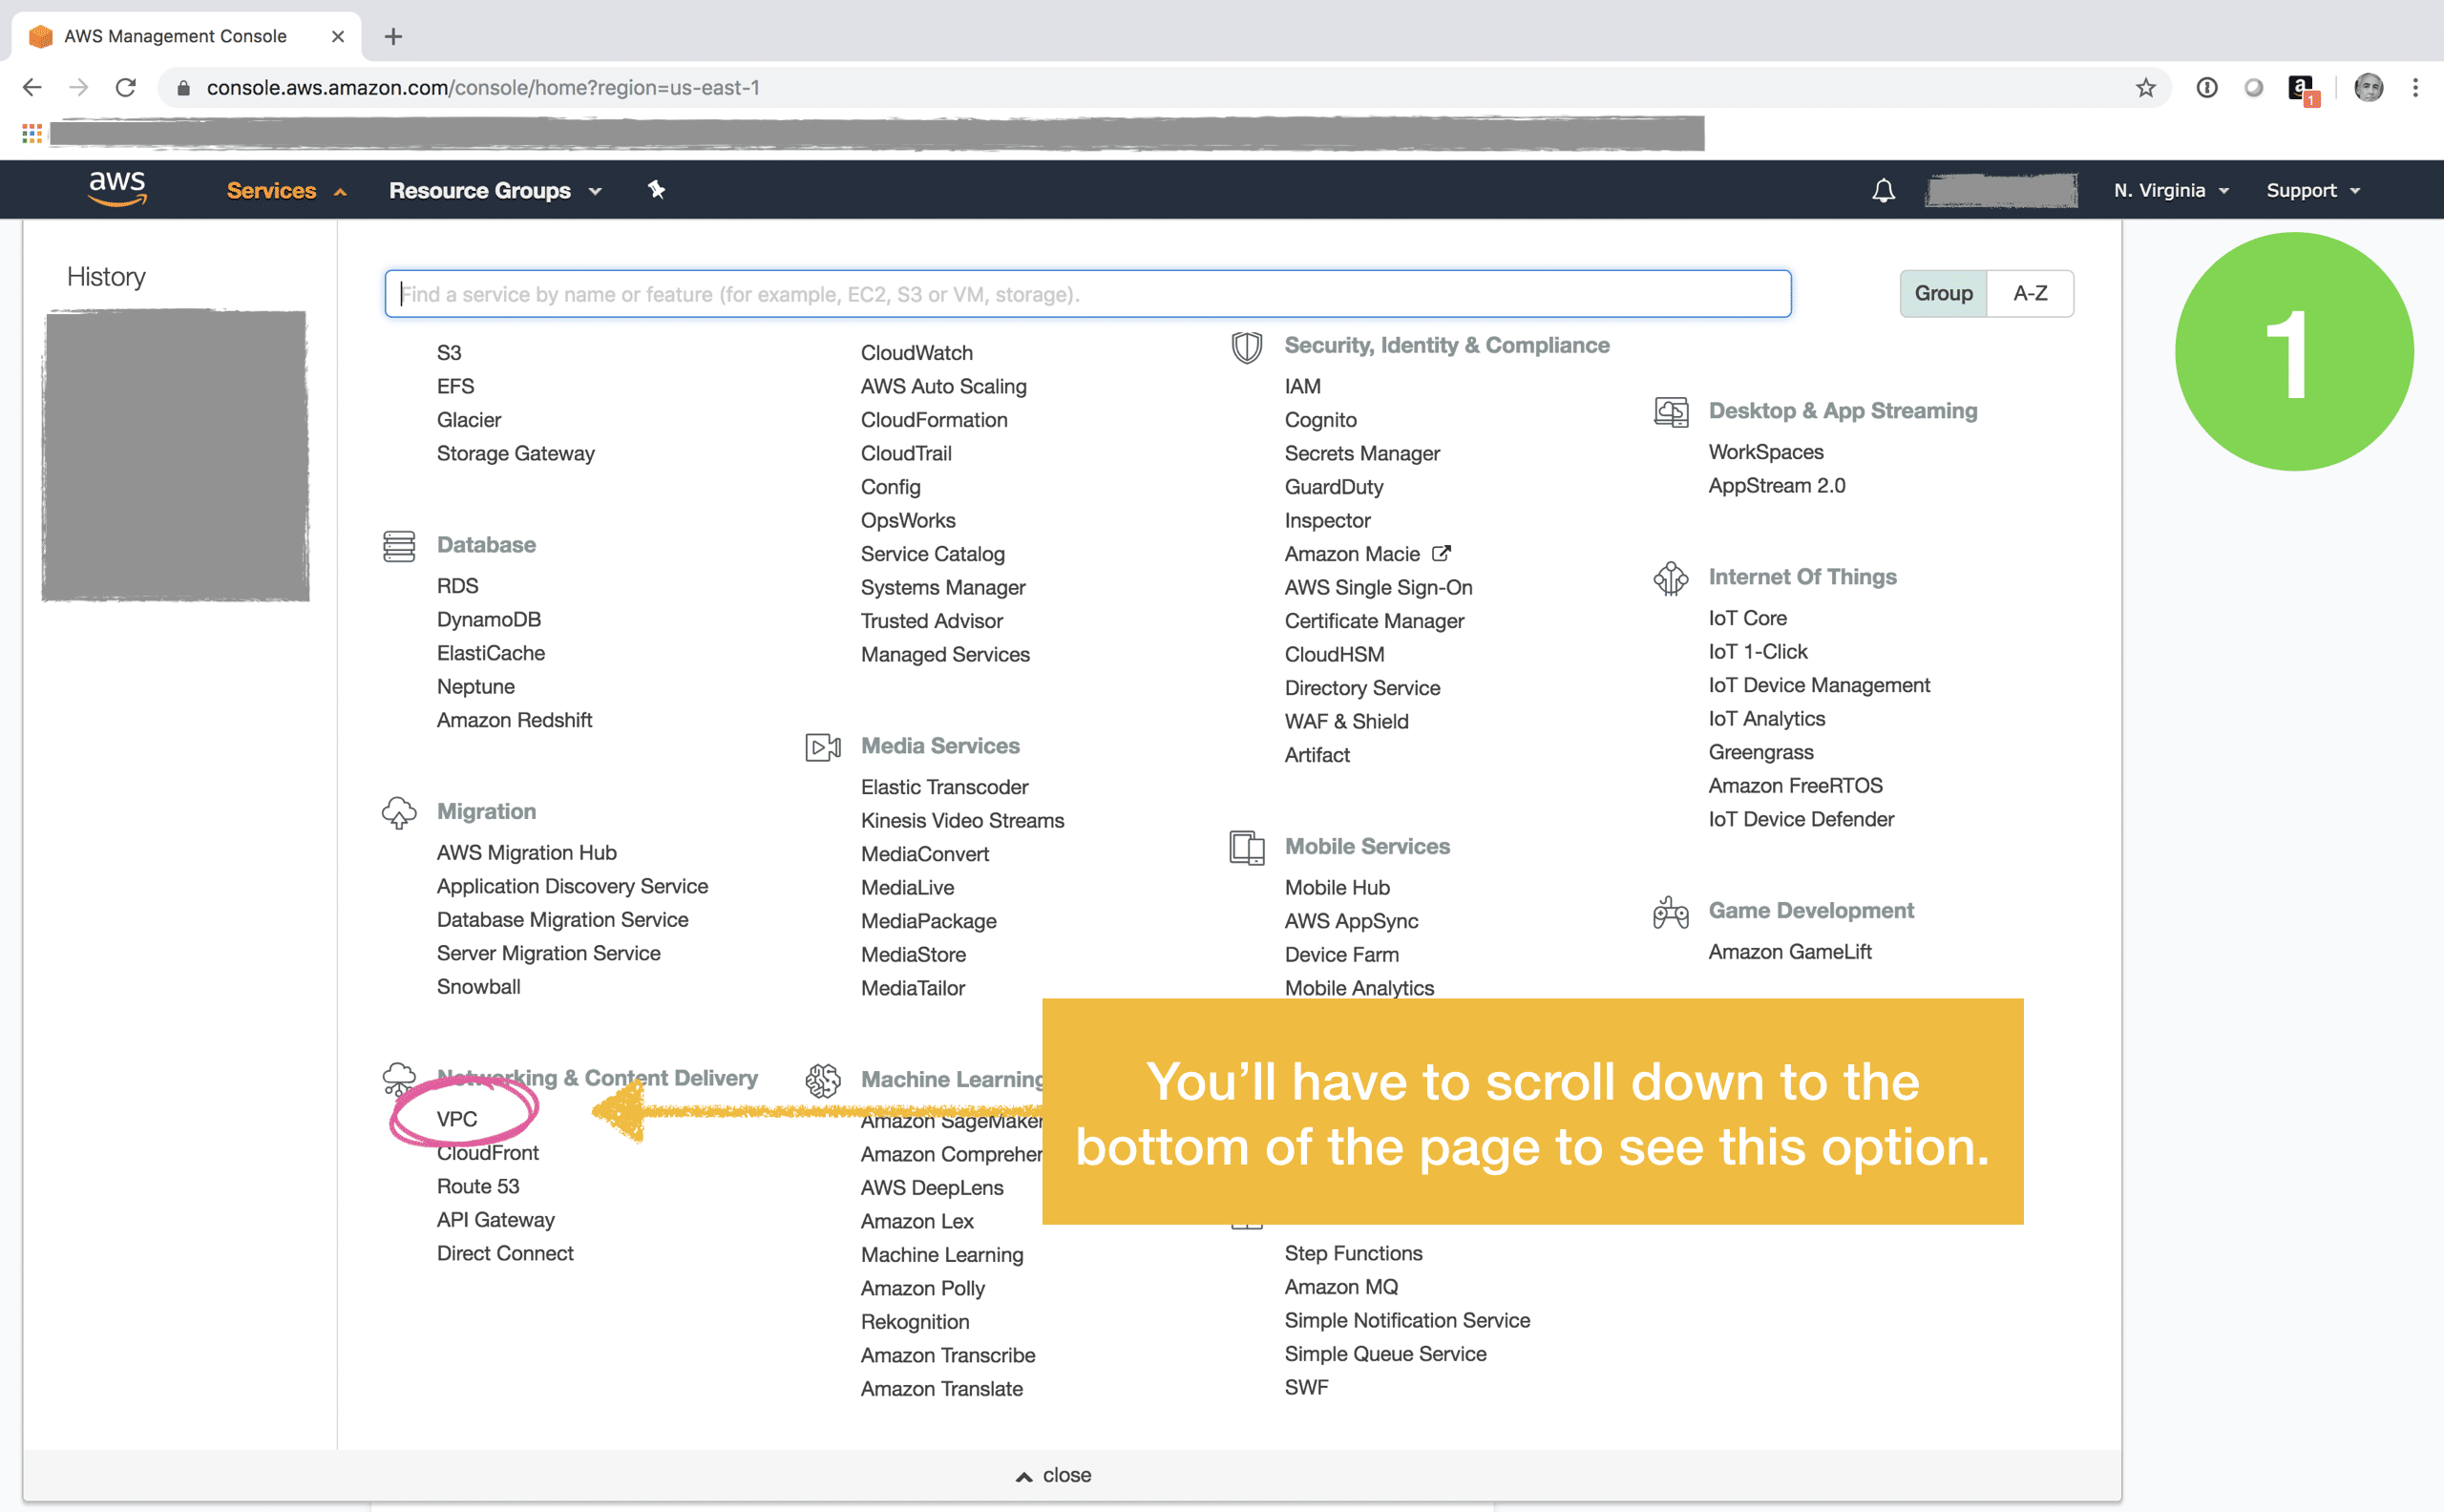
3. Setup Cloudfront
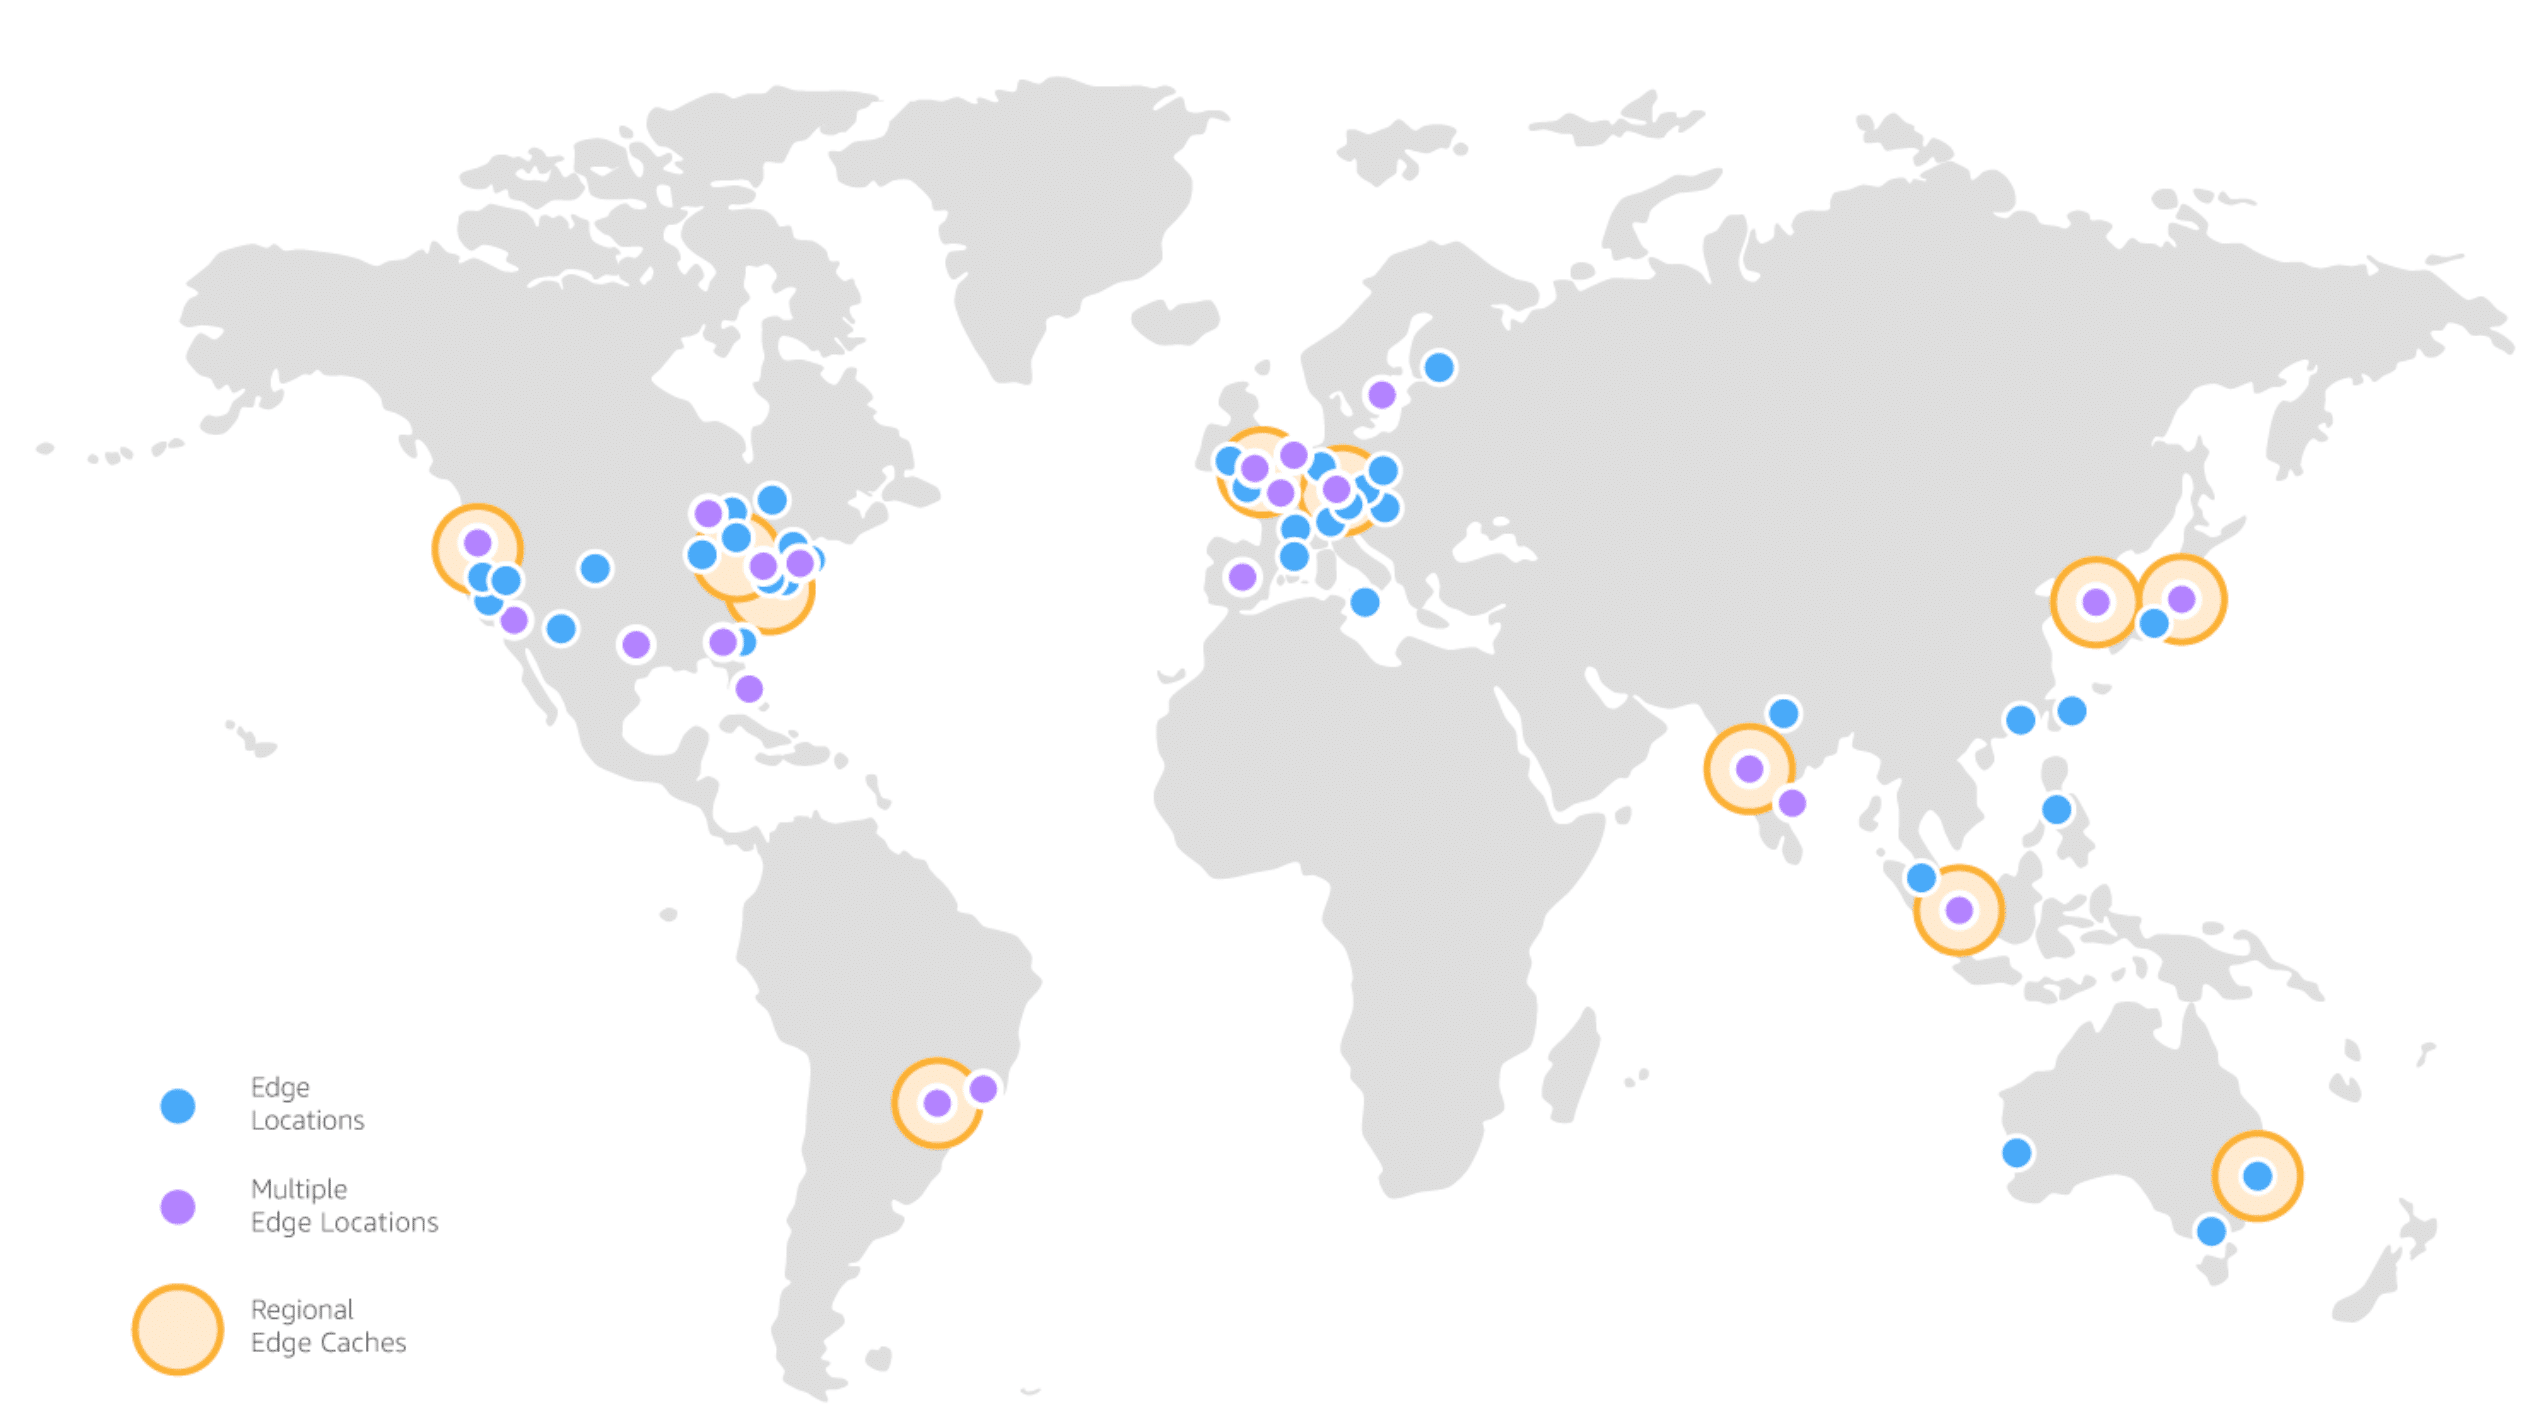
Cloudfront is AWS’ content delivery network (CDN) solution, and incidentally, it is the same CDN that delivers all content for amazon.com. A CDN is a network of content servers strategically placed around the globe, each containing a replicated copy of your static digital assets (images, videos, scripts, style sheets, etcetera). The CDN is optimized to serve your digital content to your site visitors more quickly by choosing the server that is physically closest to them. CDNs serve a large portion of the Internet content today, including web objects (text, graphics and scripts), downloadable objects (media files, software, documents), applications (e-commerce, portals), live streaming media, on-demand streaming media, and social media sites.Around half of the web content on the Internet today is delivered by AWS Cloudfront. To date AWS has invested more than $20 billion dollars into its global network of data centers and CDN edge locations, but its Cloudfront CDN service is nearly free for you to use.
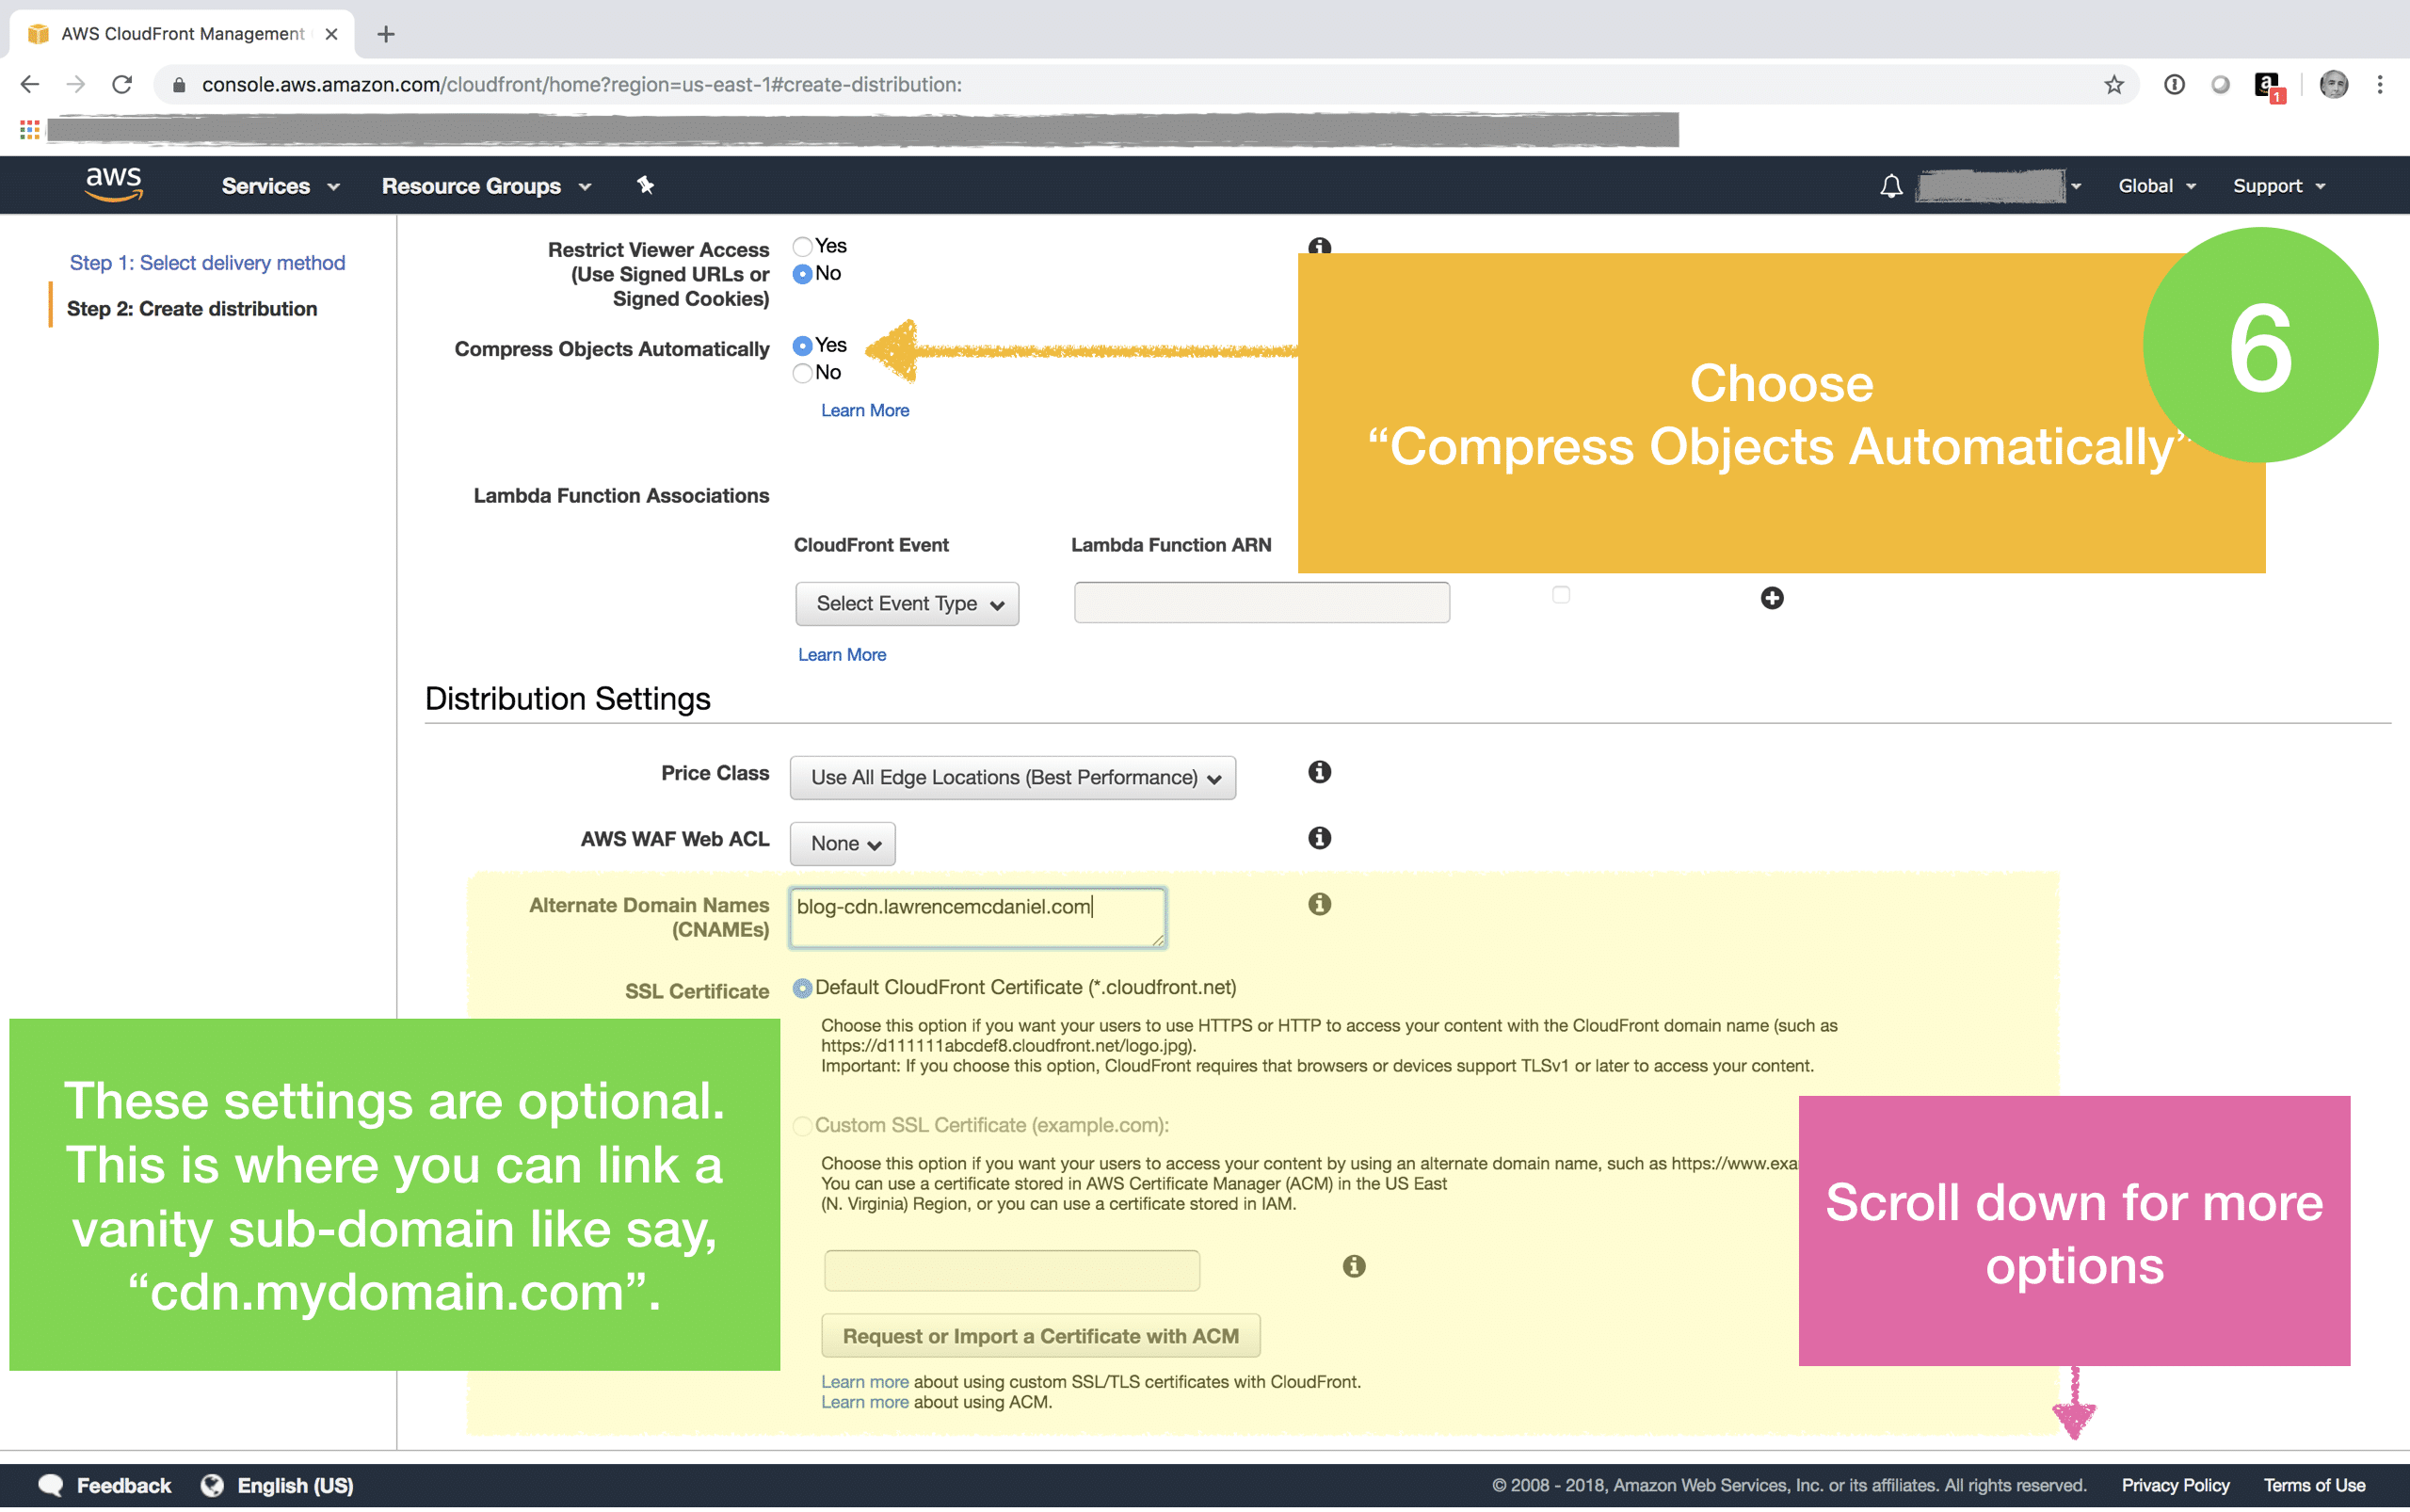
You can optionally create a custom domain for your AWS Cloudfront CDN. For example, my CDN is accessible from a custom sub domain that I created, . The team at Delicious Brains wrote a great how-to article on linking your custom domain to your Cloudfront instance.
4. WordPress S3 & Cloudfront Integration
There are several ways to integrate WordPress to S3, but there are only three ways that I’d recommend.
- WP Offload S3 Lite is a free WordPress plugin that takes care of basic integration to your Cloudfront CDN but lacks most other features. This is a good starting point if you’re on a budget or if you’re not convinced that you need to spend $59 dollars. I began with the free version and then upgraded after a few months.
- There is also a premium version named WP Offload™ S3, which is what I use for this site. Pricing begins at $65 USD. It is a full-featured solution that requires only a couple of minutes to setup, and afterwards it takes care of everything automatically. If you publish a lot then this is probably a good investment. It automatically copies files from your WordPress Media Library to Amazon S3 and rewrites URLs to serve the files from S3, CloudFront, or another CDN. And with the Assets addon, it can identify assets (CSS, JS, images, etc) used by your site and serve them from CloudFront or another CDN.
- And finally there’s W3 Total Cache. If you’re not already familiar, this is a fantastic free WordPress plugin that provides a wide range of performance enhancement functionality, including integration to S3 / Cloudfront. I used W3 Total Cache on the first couple of dozen WordPress sites that I created. It’s a fantastic way to learn the basics of site performance optimization.
Keep in mind that the following screen shots for WP Offload S3 might not match up with those on your site depending on whether you’re using the Lite or premium version.
5. WordPress Image Optimization
This is an optional though highly recommended step. Much of the unglamorous work of blogging and web development relates to preparing images for your site. For example, a typical iPhone photograph is more than 2 megabytes in size whereas web optimized images on commercial sites are 90% to 95% smaller in size. The difference in size is attributable to additional pixel density that is stored in the image files but is undetectable to the naked eye. You can try to optimize images manually but it’s a tedious trial-and-error process that, if not done well, leaves your site looking unprofessional.
A WordPress plugin + free service named Imagify solves this problem by automating the web optimization process each time you upload an image. Imagify is an advanced image optimization tool that dramatically reduces image file sizes without losing quality, making your website load faster meanwhile boosting your SEO and saving you money on bandwidth.
Imagify seamlessly integrates to Offload S3. For example it can leverage Offload S3 to move your images to S3, freeing up disk storage space on your local file system. Imagify will temporarily download the image from S3, optimize it and re-upload it through Offload S3.
6. Verify Your Results
If everything is working correctly then, regardless of which WordPress plugins you opted to use, for any URL references to images and other content from your WordPress media library you should see the domain of your CDN embedded in the html generated by your site. Keep in mind also that, since our CDN solution replicates the WordPress media library rather than relocating it, our media content will ultimately reside in multiple locations simultaneously, each of which is accessible via an http(s) request. The following table contains the http links to various intermediary storage locations on this blog for a sample image file that I prepared and uploaded for this post. Feel free to try each.
SourceAddress https://cdn-blog.lawrencemcdaniel.com/wp-content/uploads/2018/09/10090344/cdn-setup-test-image.pngThis is the original URL reference to the media that you uploaded to WordPress.
 https://cdn-blog.lawrencemcdaniel.com/wp-content/uploads/2018/09/10090344/cdn-setup-test-image.png
 https://cdn-blog.lawrencemcdaniel.com/wp-content/uploads/2018/09/10090344/cdn-setup-test-image.png
 https://cdn-blog.lawrencemcdaniel.com/wp-content/uploads/2018/09/10090344/cdn-setup-test-image.png
Now then, to really understand the impact that your global site visitors you need a way see how your site performance when called from various locations around the world. Lucky for you, there’s a free site named Pingdom.com that does exactly that! Using pingdom you can test your page load times from far-flung locations like Sydney Australia, Paris France and New York City. By testing your page performance both with and without your new CDN you’ll be able to see the impact it has for these visitors.
I hope you found this helpful. Please help me improve this article by leaving a comment below. Thank you!


